
 Back to Homepage
World's Longest Bathroom Renovation
4/5/2022
I bought my first house in 2021, which is widely considered to have been a bad call. The market was in such a state that I needed to make an offer after only a 30 minute walkthrough, which I had to share with other potential buyers. No time for inspections. Months later, upon first receiving the keys, I walked around in utter dismay at the house I had just overpaid for.
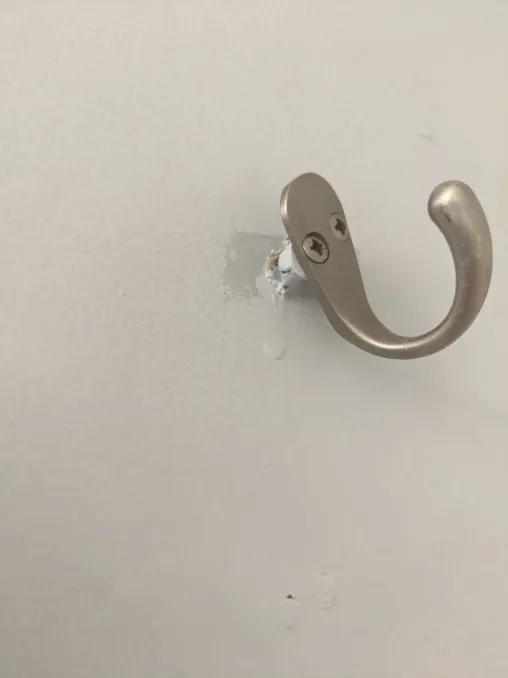
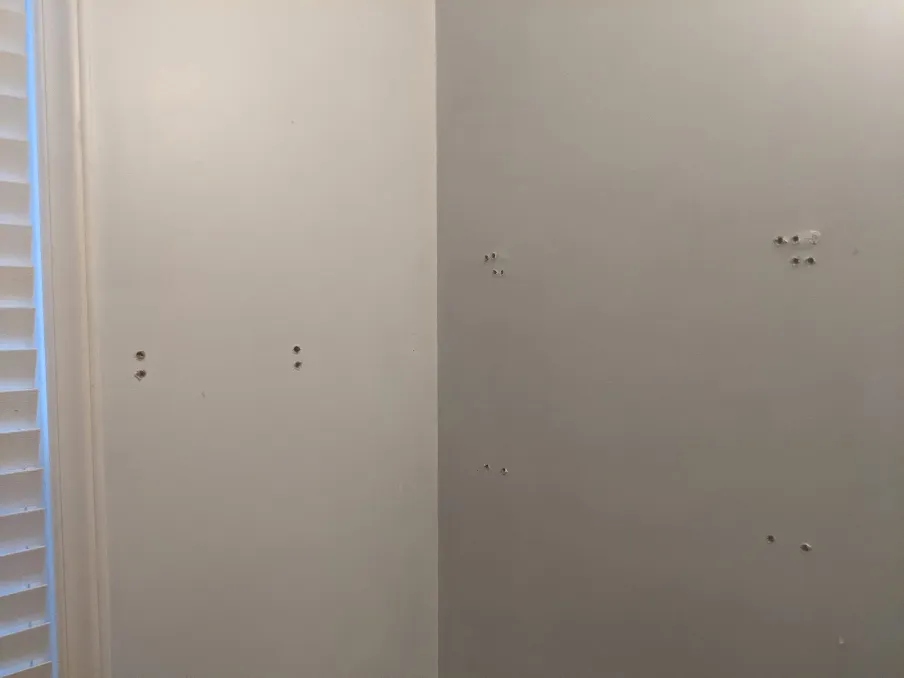
- Shelves were attached to the walls with massive screws.
- The drywall was covered in "nail pops."
- The linoleum floors were bubbling.
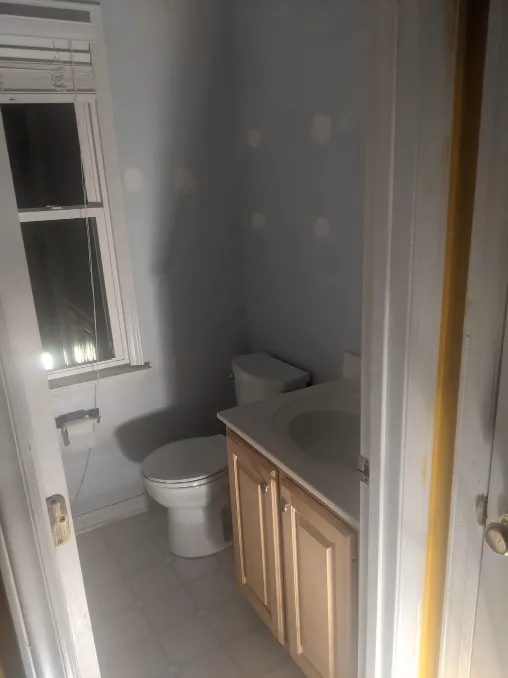
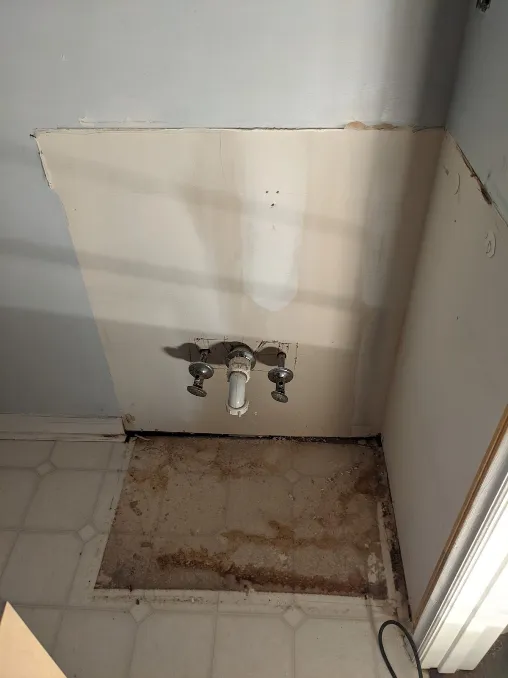
- The sink barely dribbled any water, and that water didn't drain from the basin.
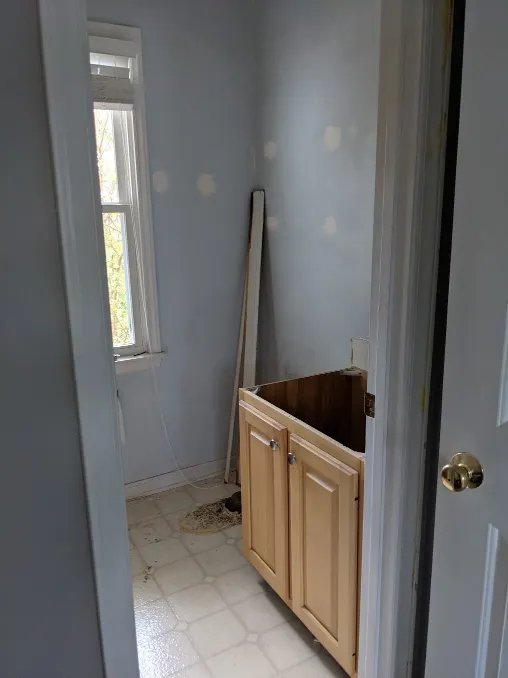
- The vanity was too big, leaving no room to stand.
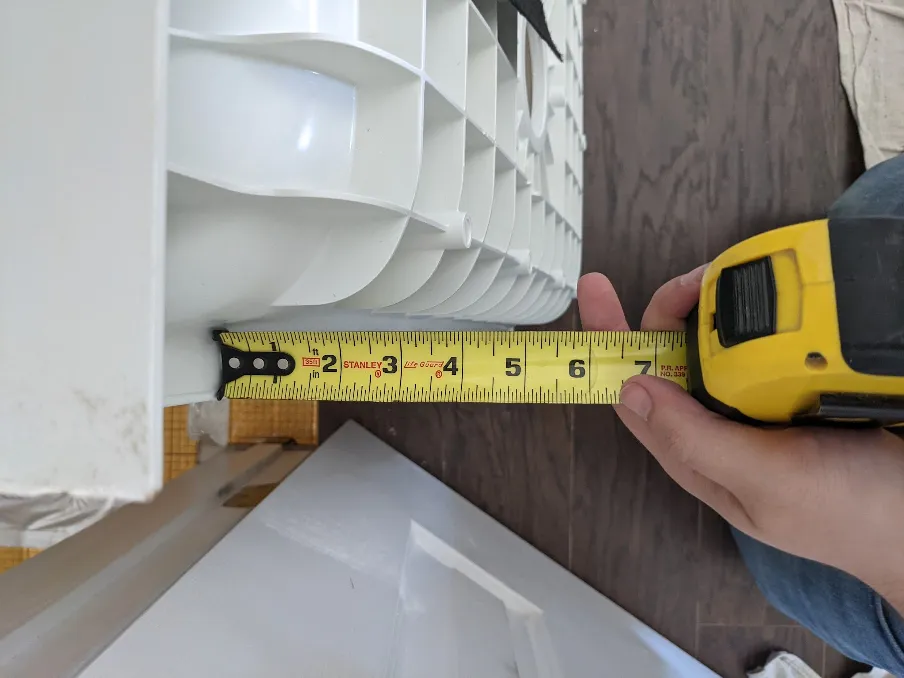
- The extraction fan didn't work.
- When I pulled back the shower curtain (which the previous owners had left behind), I found a box of "tub repair" paste, sitting atop a massive crack in the fiberglass tub.
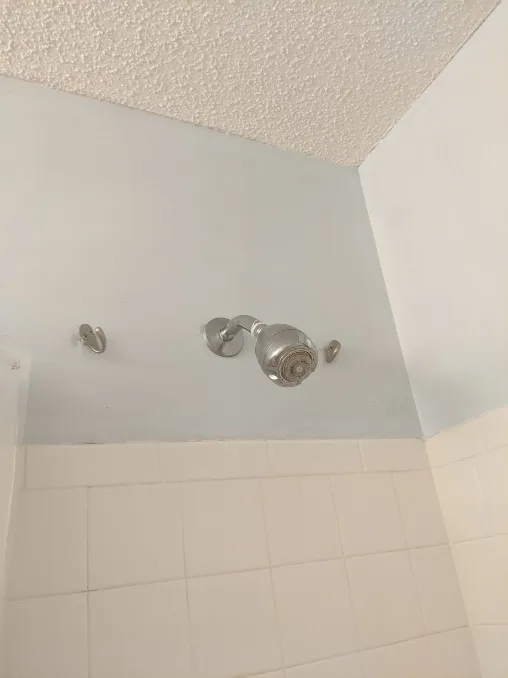
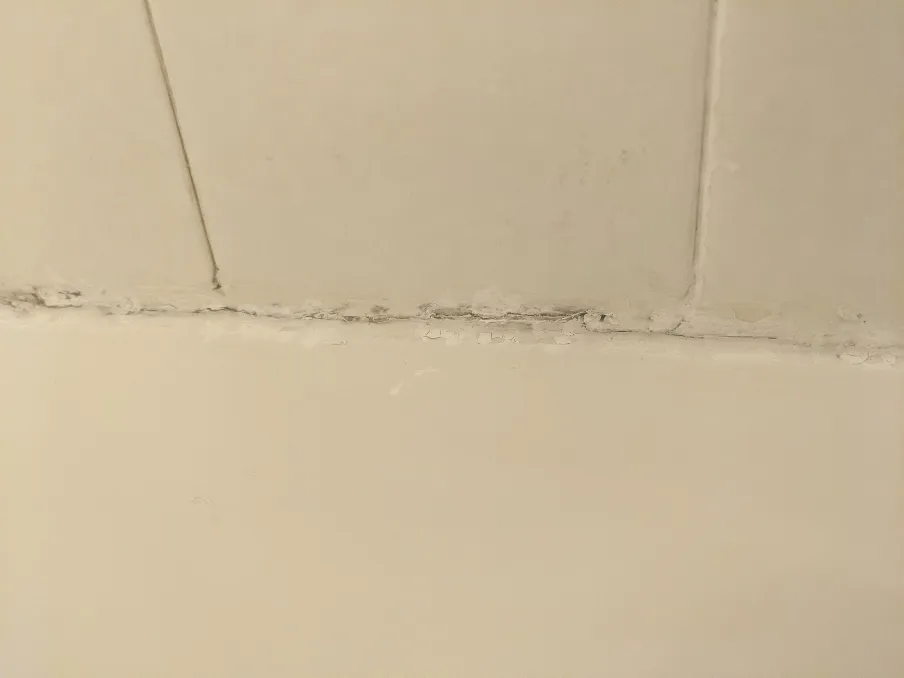
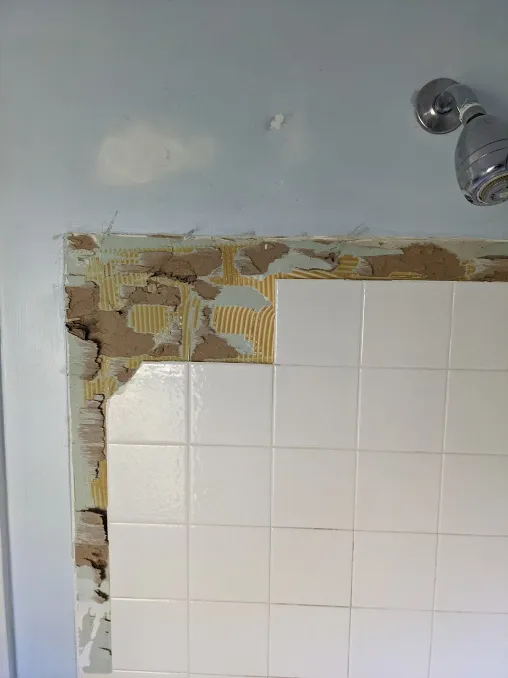
- Above the tub, tiles were sealed with what looked like hot glue and paint.
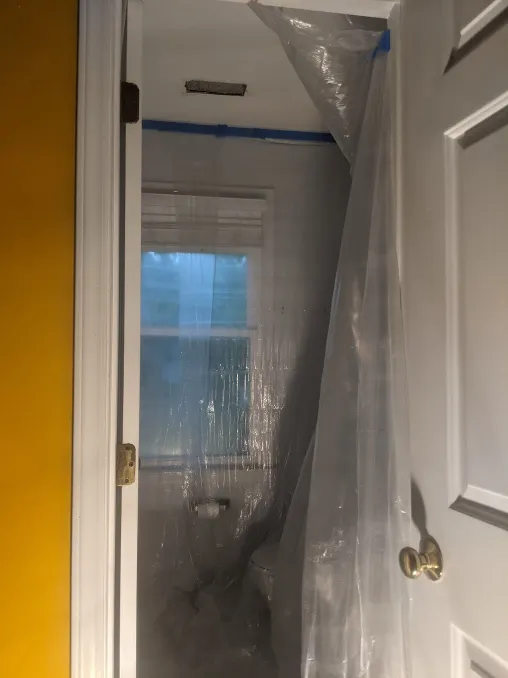
- Then, the final straw. I looked up, and saw a popcorn ceiling.

All of these problems combined in my head to draw a single conclusion: I had to start from scratch. After discussing this with a few contractors, I decided to try doing it myself. Contractor time was at a premium, and I would have needed to spend upwards of ten or fifteen thousand dollars to complete this bathroom alone.
It wasn't just a bathroom, the whole house needed a similar amount of work, but the bathroom represented the worst of these projects. I would finish work every afternoon, drive over to the house, build until 9 or 10, then drive to my mom's house where I was staying while renovating.
This turned into one of the most tedious processes of my life. Every step forward uncovered another problem, every improvement was more involved than the last. I bought a house in May, took ownership in July, did construction for 8 months straight, and finally moved in March of the following year.
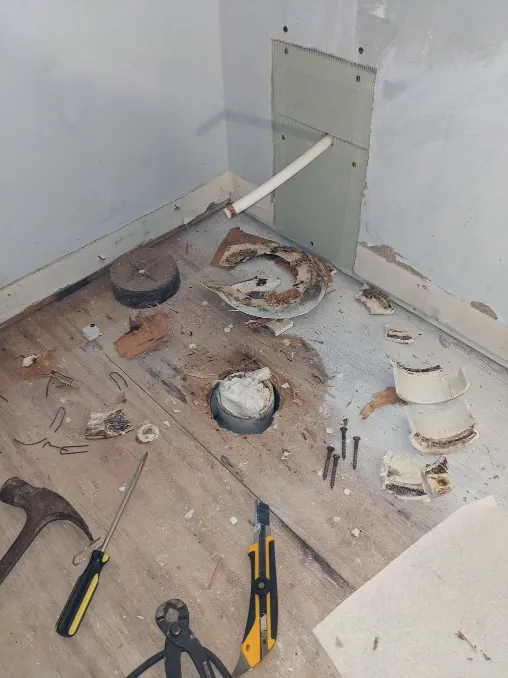
I didn't know how long it would take when I started. I just knew I needed to start with demolition. I removed the toilet, the sink, and the vanity. You might expect the toilet to smell bad on the way out, but the P-trap of a sink smells so much worse. The popcorn ceiling was scraped clean and primed somewhere in there as well.
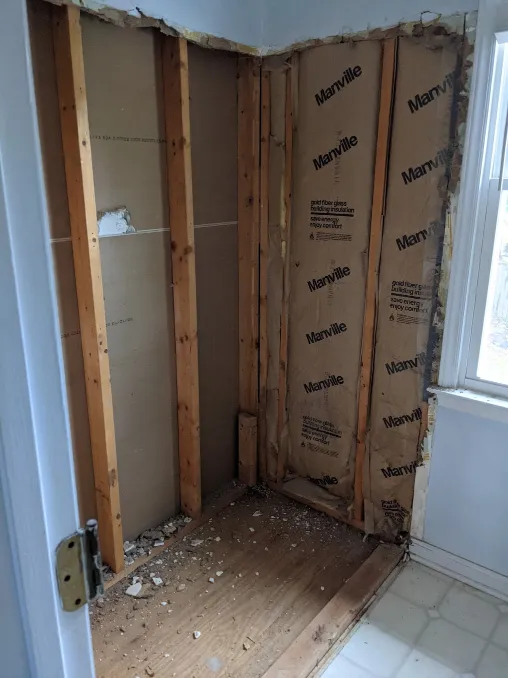
I was told that I could use a prybar to chip tiles straight off of the wall. Instead, the prybar dug into the wall. It turns out, rather than using cement board and mortar, the original builders simply used construction adhesive to glue the tiles to some greenboard drywall. Truly the lowest-effort method of building a shower. There was no way I could remove the tile cleanly, so I cut out the entire shower, ripping everything back to the studs.
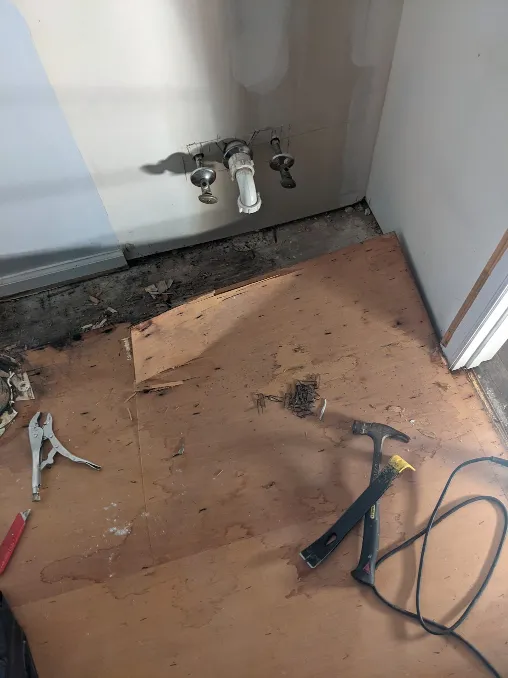
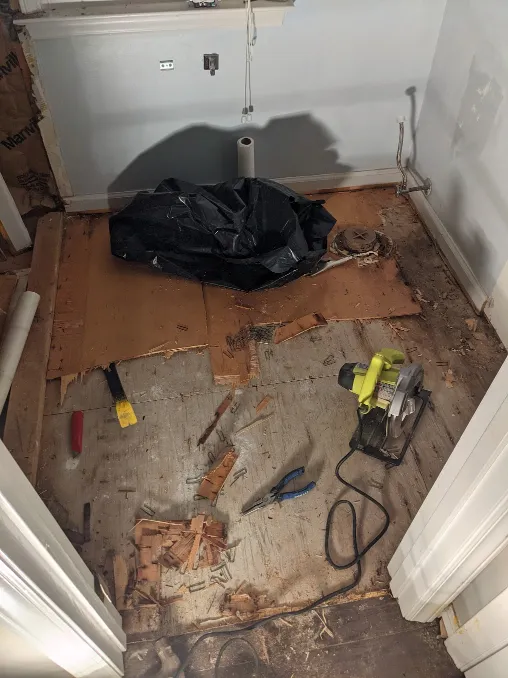
The vinyl floor came out easily, its adhesive was already failing. the 1/4" plywood underlayment didn't come out so quickly. Someone had stapled it down with so many staples that it took two days to pull up. Additionally, the toilet flange needed to be demolished with a hammer and chisel, being careful not to damage the pipe it was attached to.
Speaking of pipes, the entire house was originally plumbed with polybutylene. Polybutelyne is illegal to install in new houses, due to a law that passed roughly a month after this house was built. It all needed to be replaced. Not just this bathroom. Every pipe in the house. Skipping over this, I now have some nice PEX lines.

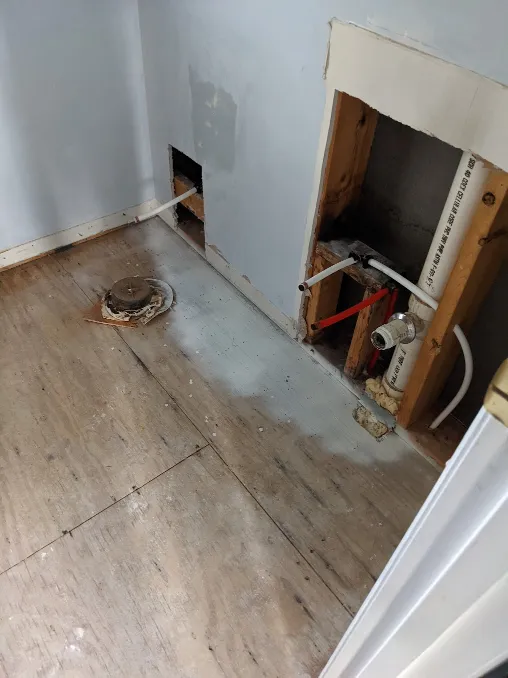
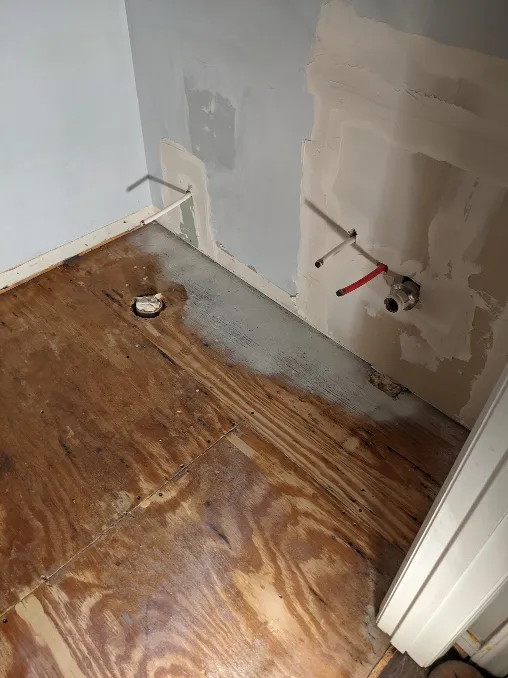
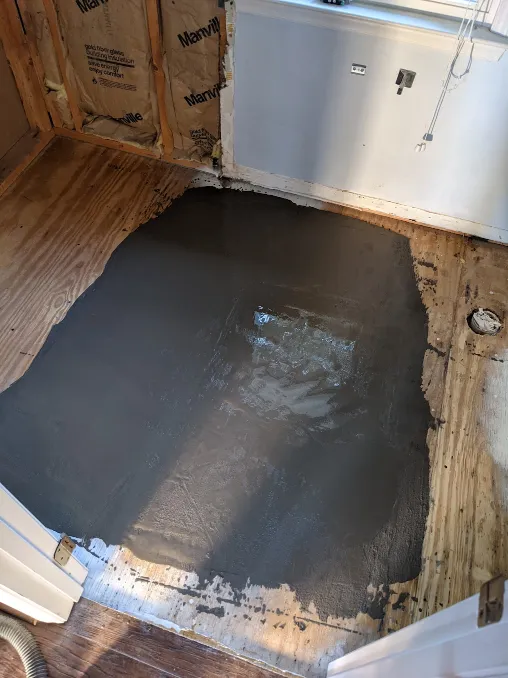
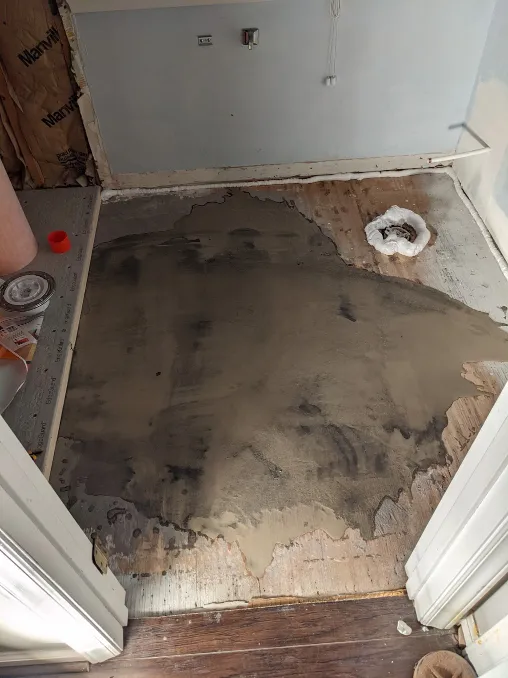
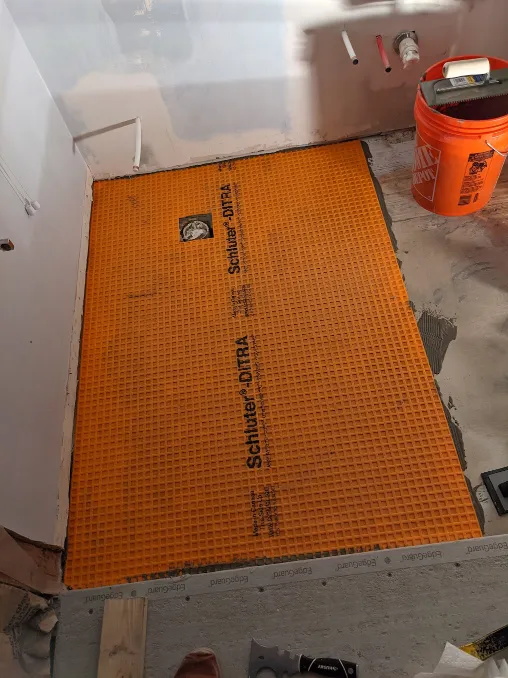
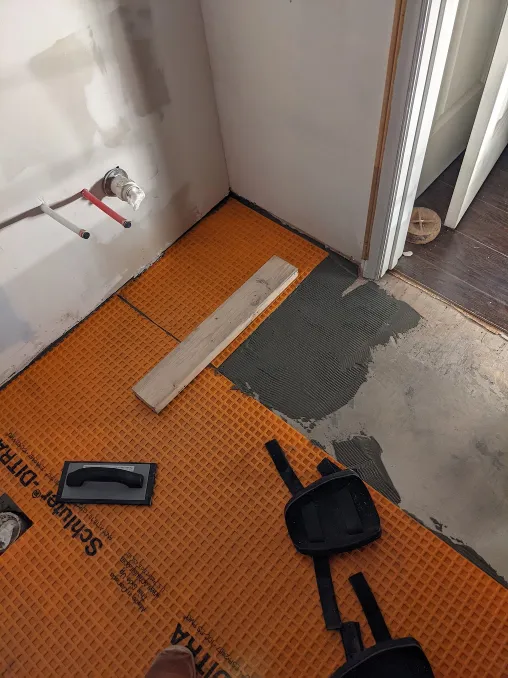
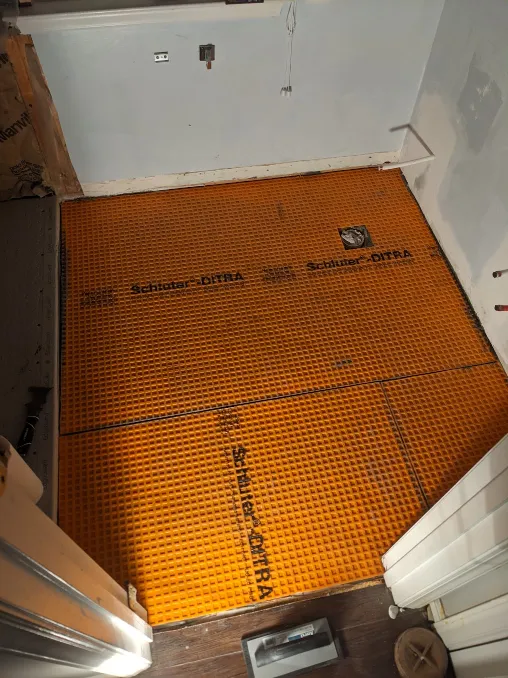
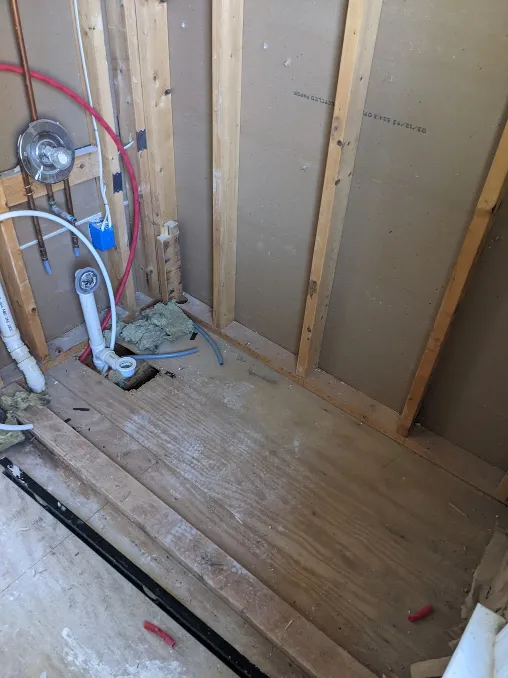
While this was happening, I started preparing the rest of the room. There were two problems: Minor water damage from previous leaks, and a significant sag in the middle of the room. The water damage was solved with some sealant, as well as an expensive orange membrane, sealing the subfloor from future leaks. The sagging floor was solved by a few buckets of self-leveling cement.
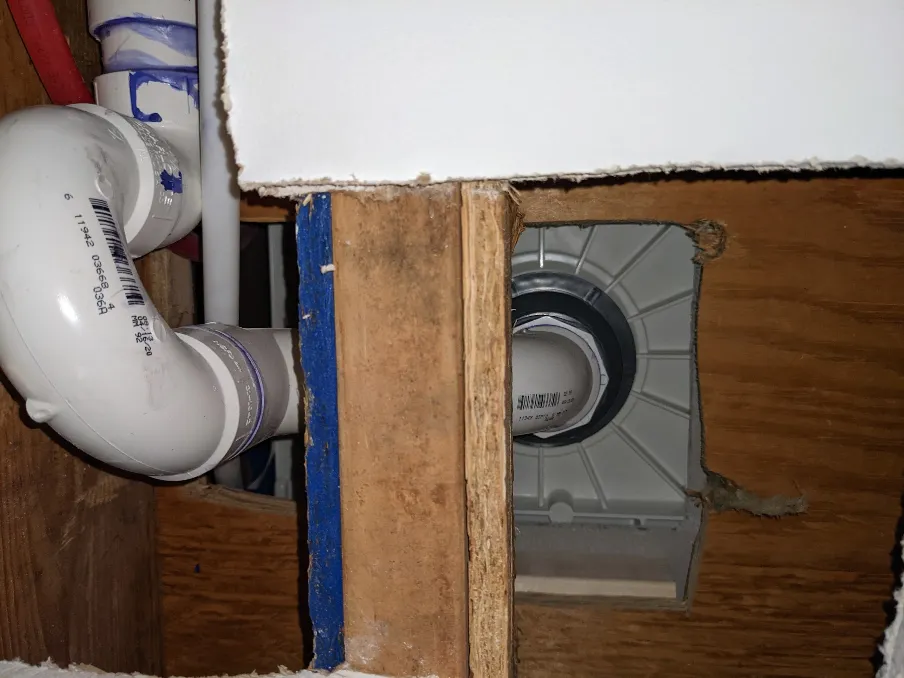
I decided to replace the tub with a shower pan and a glass door, to make the room feel a little bit larger. When the shower pan arrived, I discovered another issue. The vent pipe for the shower drain was routed through the tub. The shower wall was structural, meaning a hole couldn't be drilled through the bottom of it. Instead, the pipe went around the toe plate.
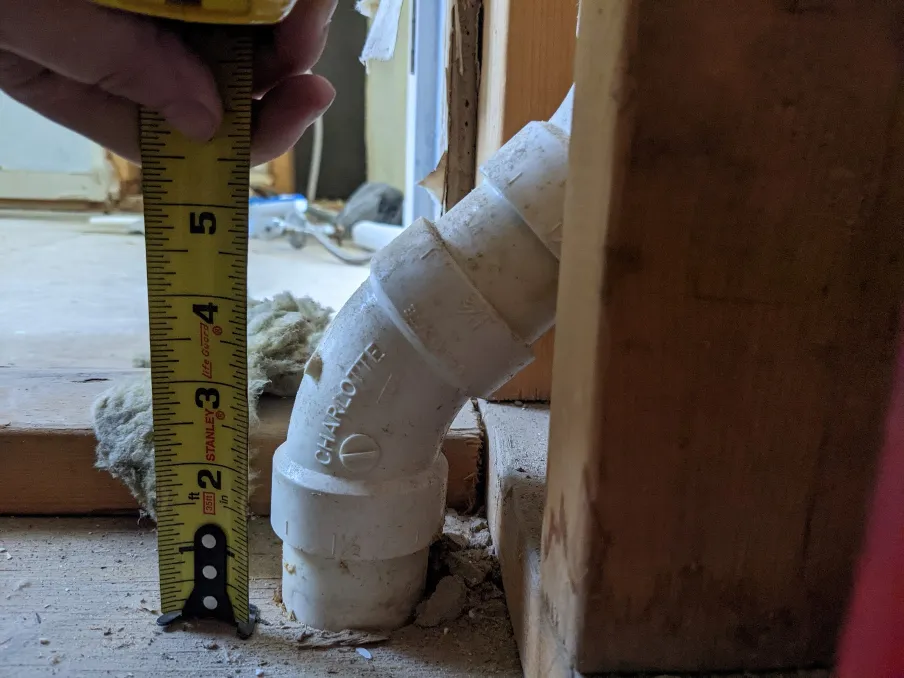
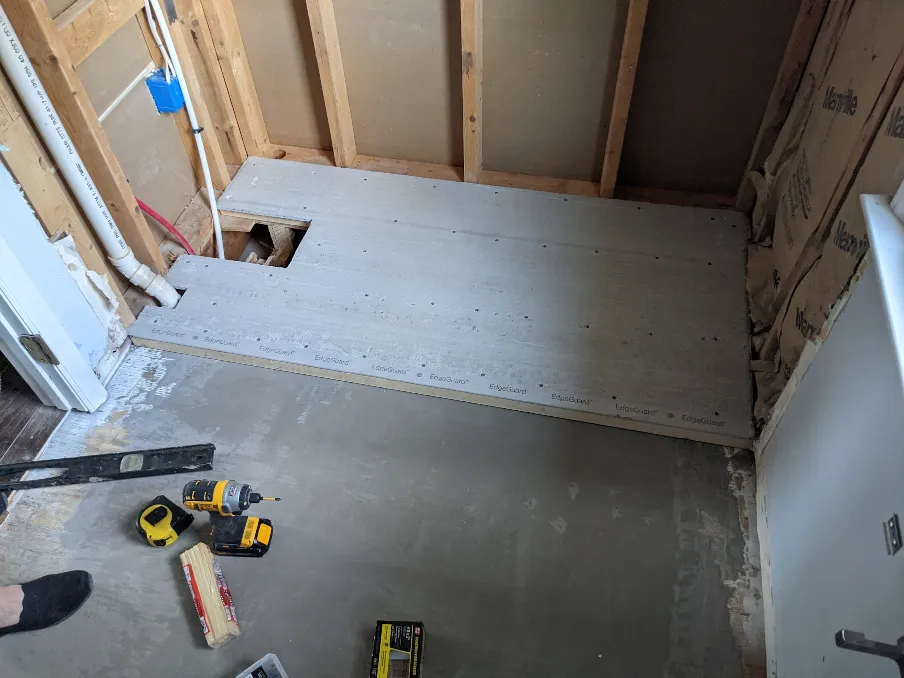
A plumber recommended that I build another wall in front of the existing wall. I measured everything, and came up with a better plan. A "Platform Shower™." If I lifted the shower pan up by around 2 inches, there would be around half an inch of clearance around the vent pipe.
I over-engineered a platform made from 2x4s for the shower pan to sit on, and used cement board to top it off. The 2x4s would primarily take the weight, and the cement board would provide a flat surface to embed the pan onto.


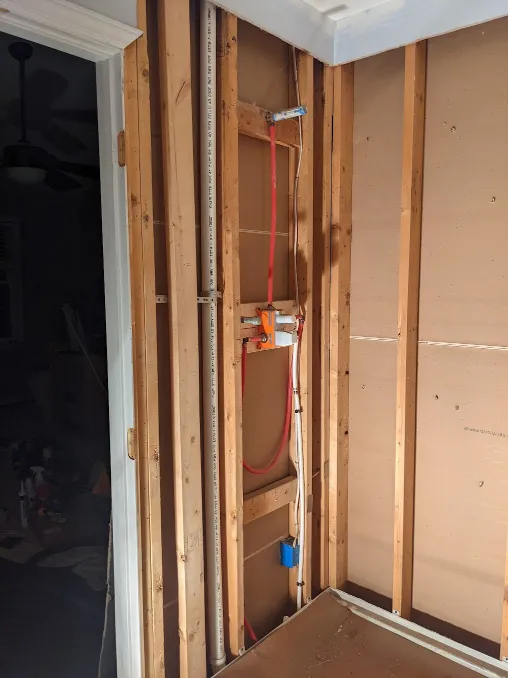
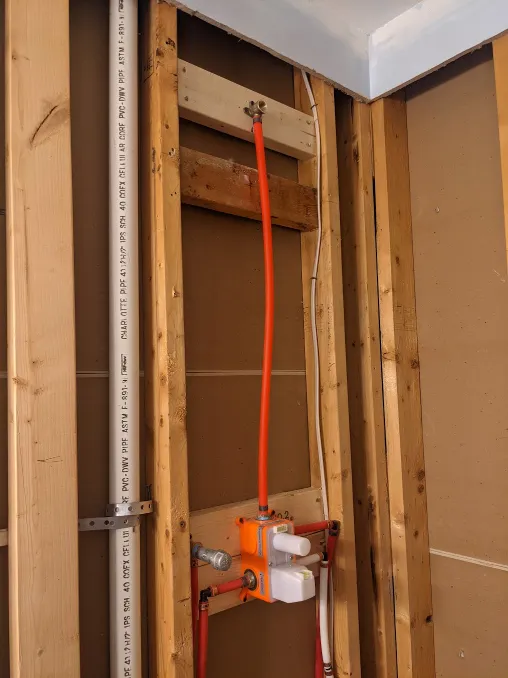
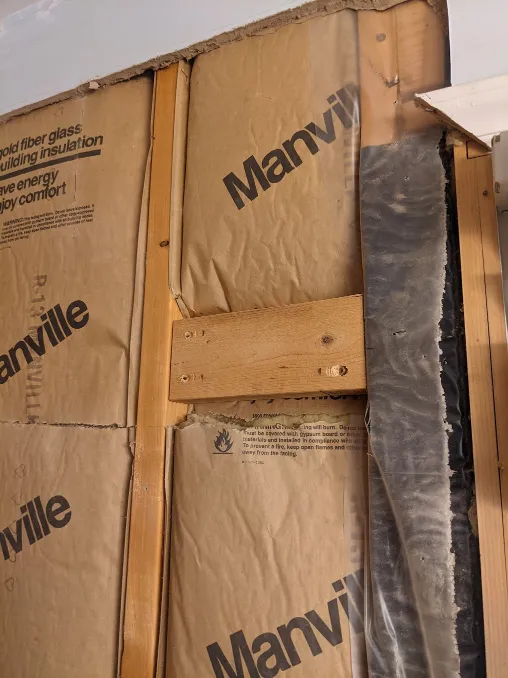
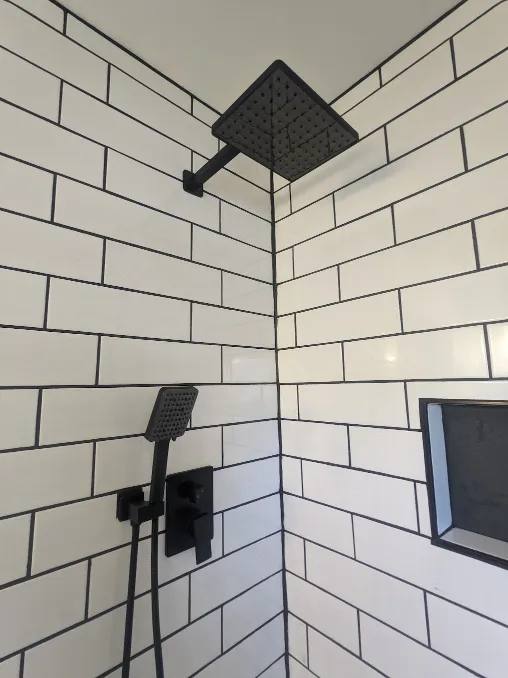
With this solution in place, it was time to plumb the shower. I used standard heights that I found online and in code guidelines, and found that the shower head was way too low, so I raised it around 6". While i had the walls open, I also added some extra framing to support the glass door that I had ordered. It would be significantly heavier than the previous residents' curtain.
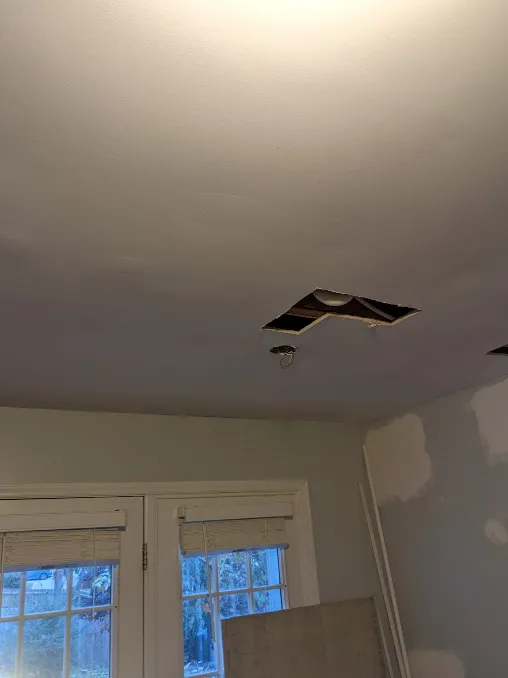
Meanwhile, in the kitchen, directly under this bathroom, there was a hole in the ceiling. This shower pan, and the corresponding drain, are only meant to be installed in new construction, with access from underneath. In my case, this meant cutting yet another hole in the drywall.
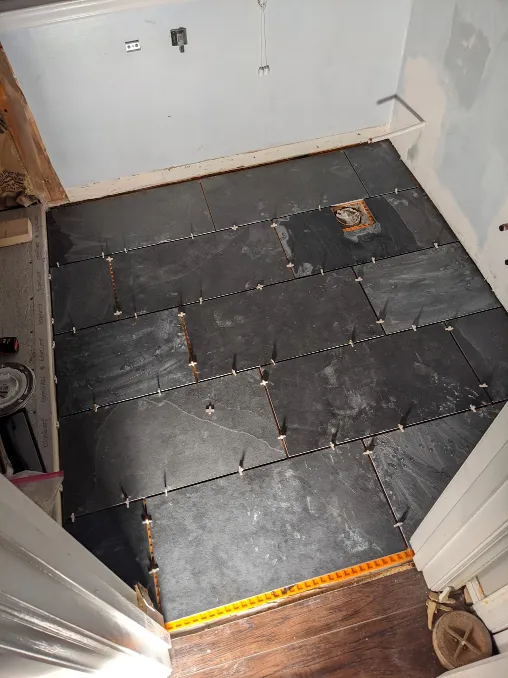
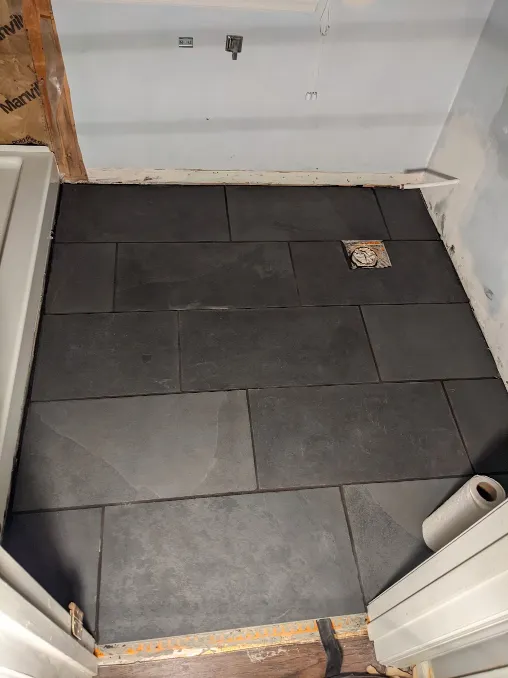
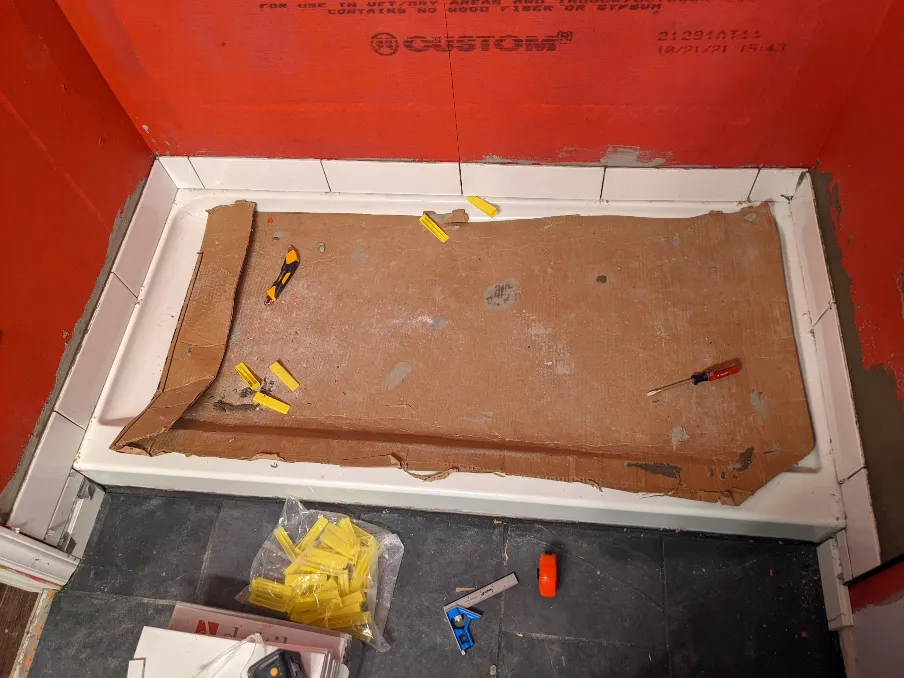
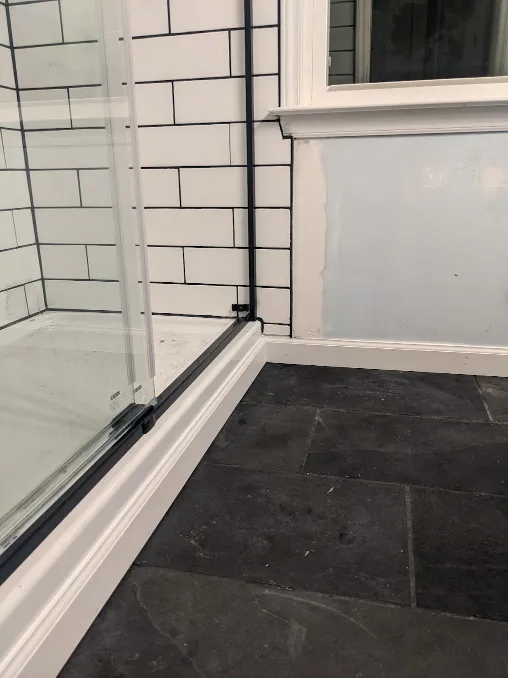
At this point, I was waiting on some supplies to arrive, so I decided to tile the floor. I found some great large-format slate tile, and cut all of it ahead of installing, then test-fit the whole pattern. This stuff cut easily and fit perfectly in the space. I used a charcoal grout to keep the whole floor dark, and I really like how it turned out.
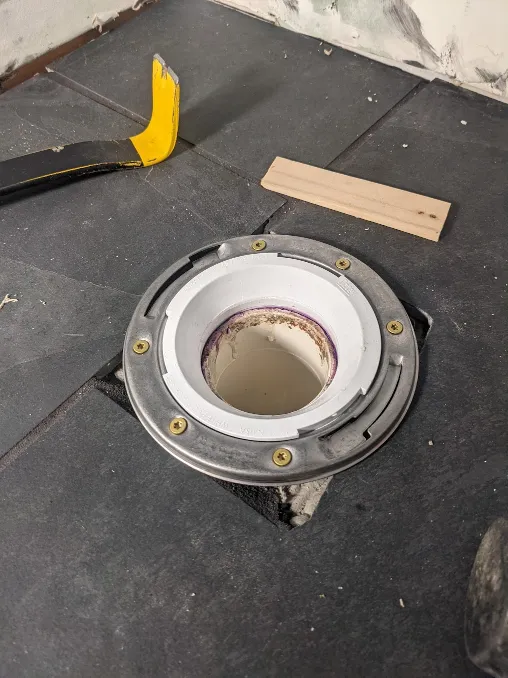
With the floor complete, I could also install the new toilet flange, which was much easier than expected.
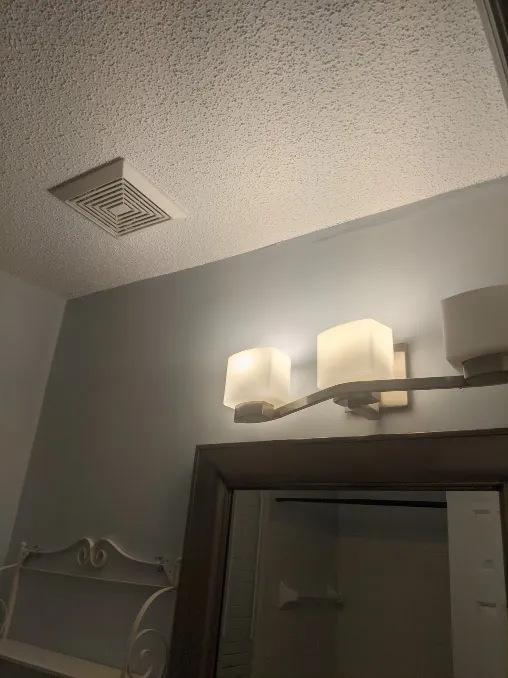
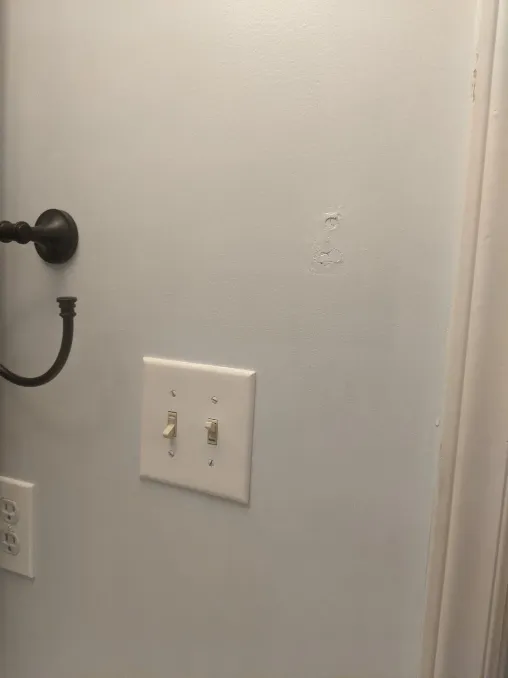
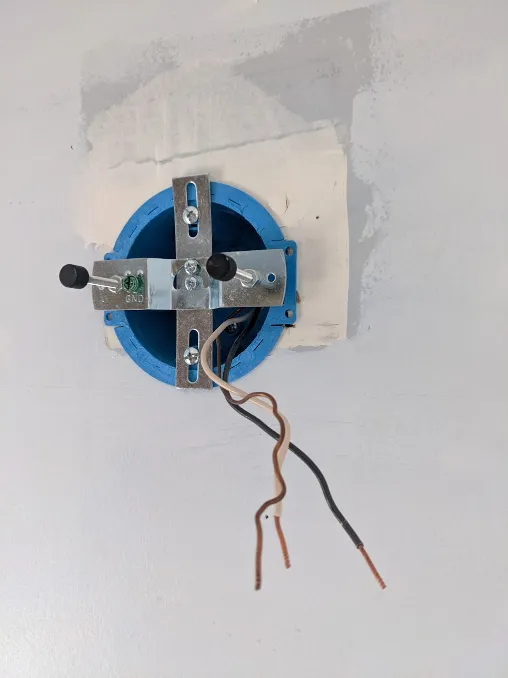
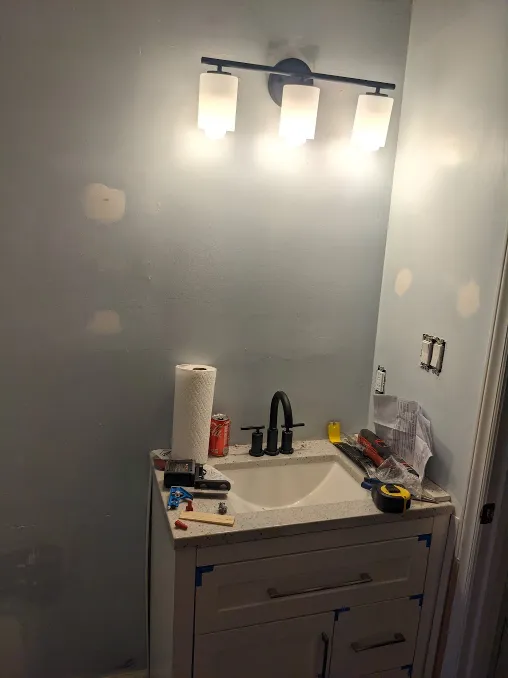
Still waiting on supplies, and very tired of working in the dark, I updated the electrical in the room and temporarily installed my new light fixture. The outlets and light switches for the entire house needed to be replaced, and not a single light fixure was up to code. Rather than install light boxes, the original builders simply cut a hole in the drywall for the electrical cable, and screwed the fixture directly to the remaining drywall. I installed an old-work box, wired in new switches, added a GFCI outlet, and enjoyed my newly brightened construction zone.
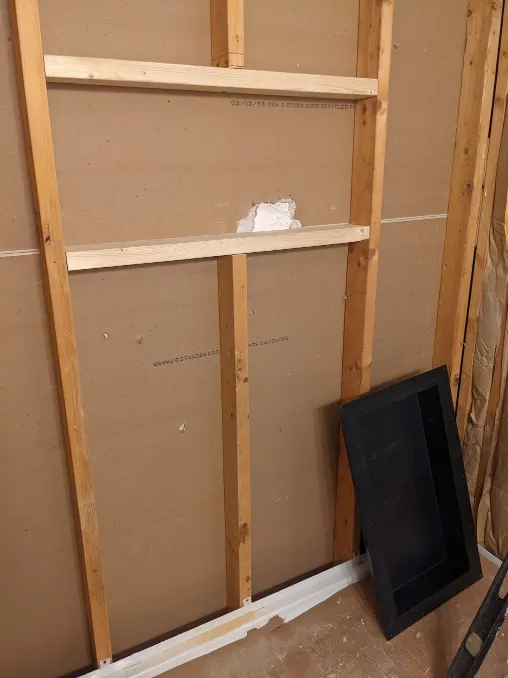
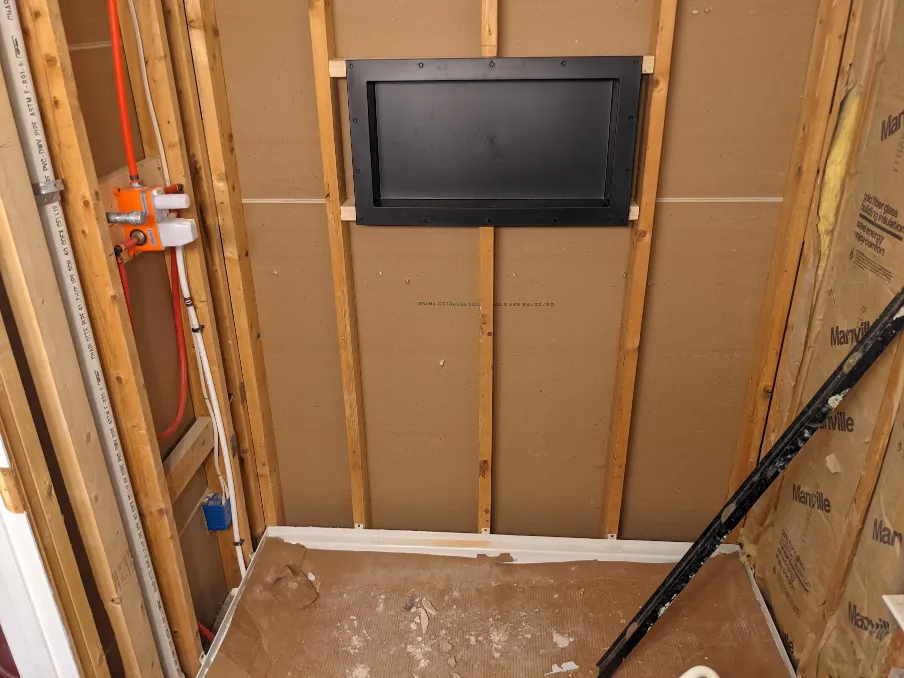
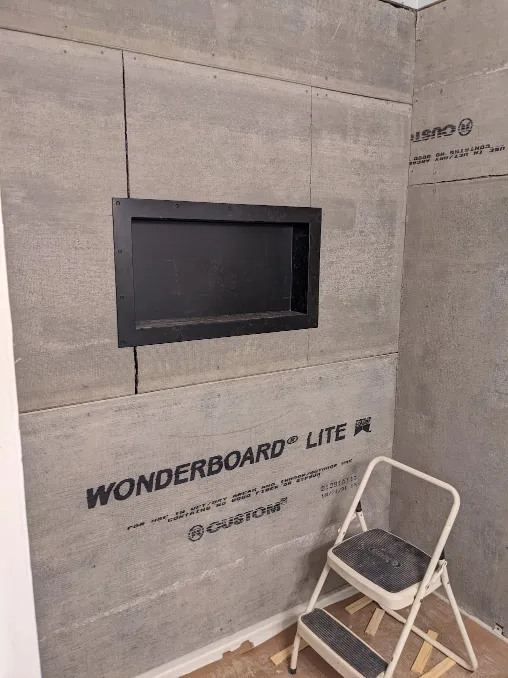
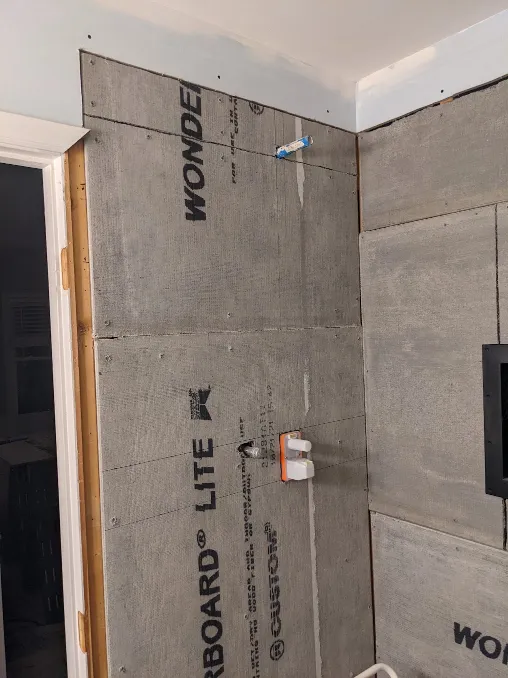
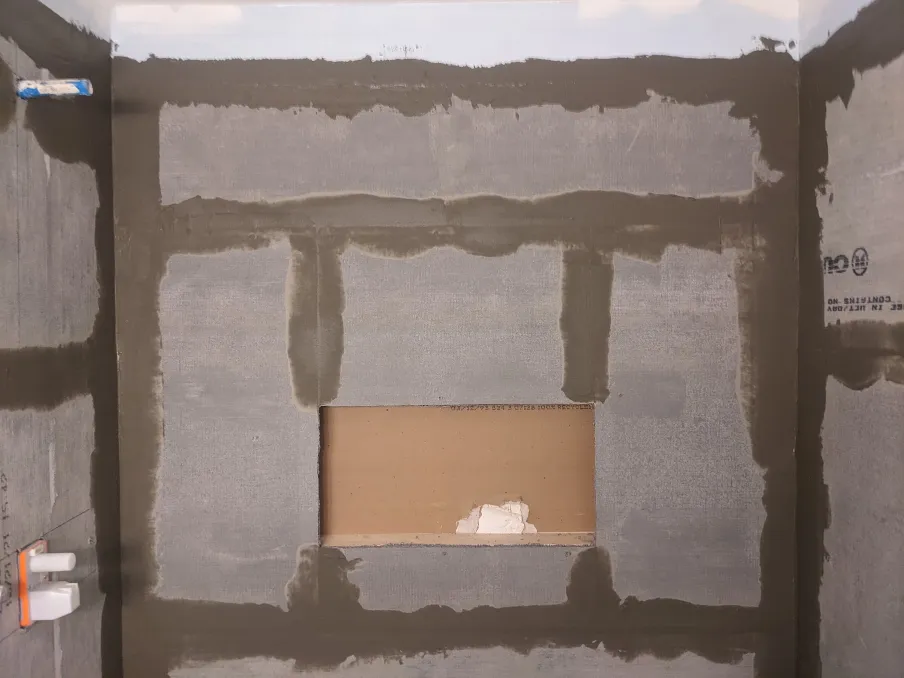
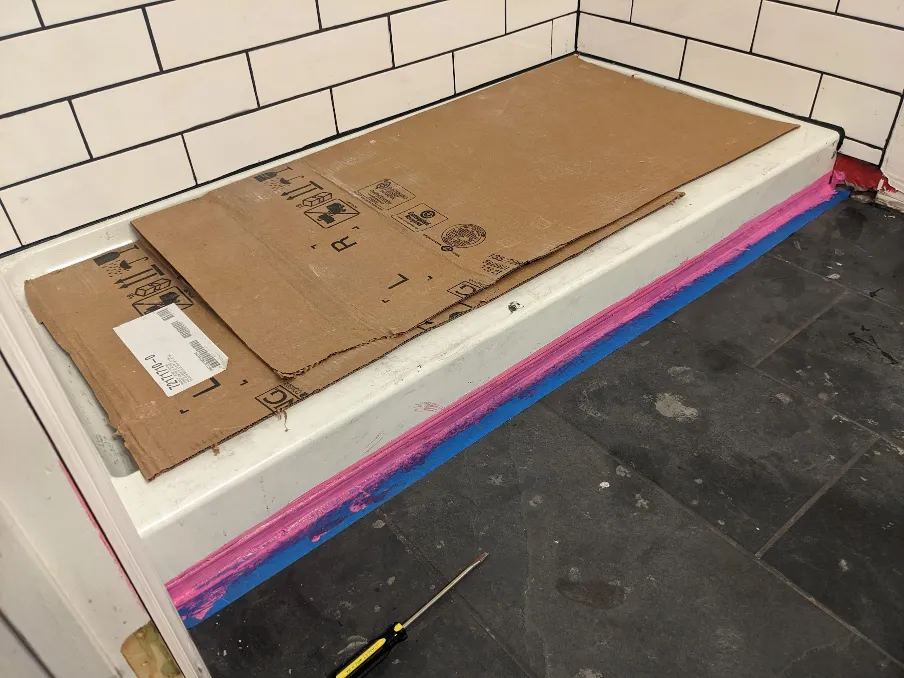
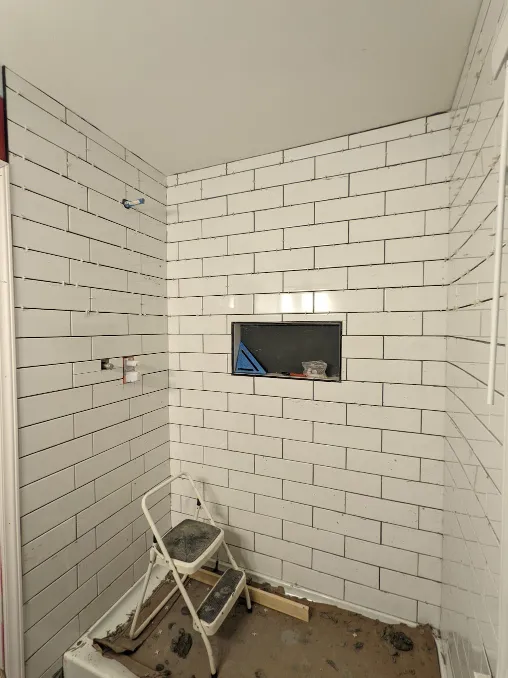
Finally, my new shower niche arrived, so I framed a cutout in the side wall of the shower for it. With all of my framing complete, I was able to add cement board to the walls and seal the whole thing with a red rubber coating. I also added this rubber coating around my Shower Platform™ to seal the edge of the shower pan, and hopefully keep any standing water from intruding into the 2x4 structure.

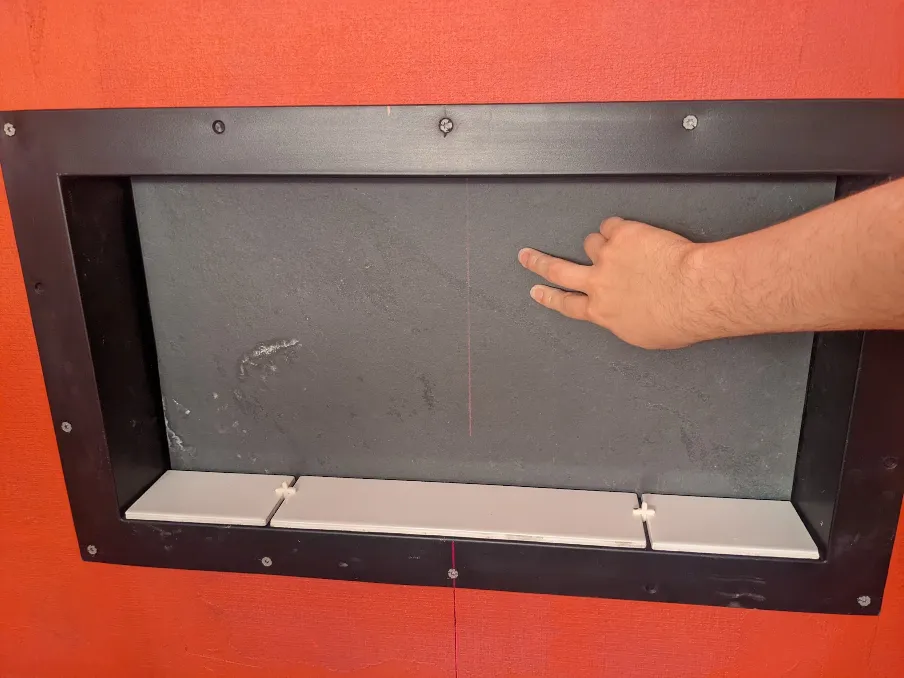
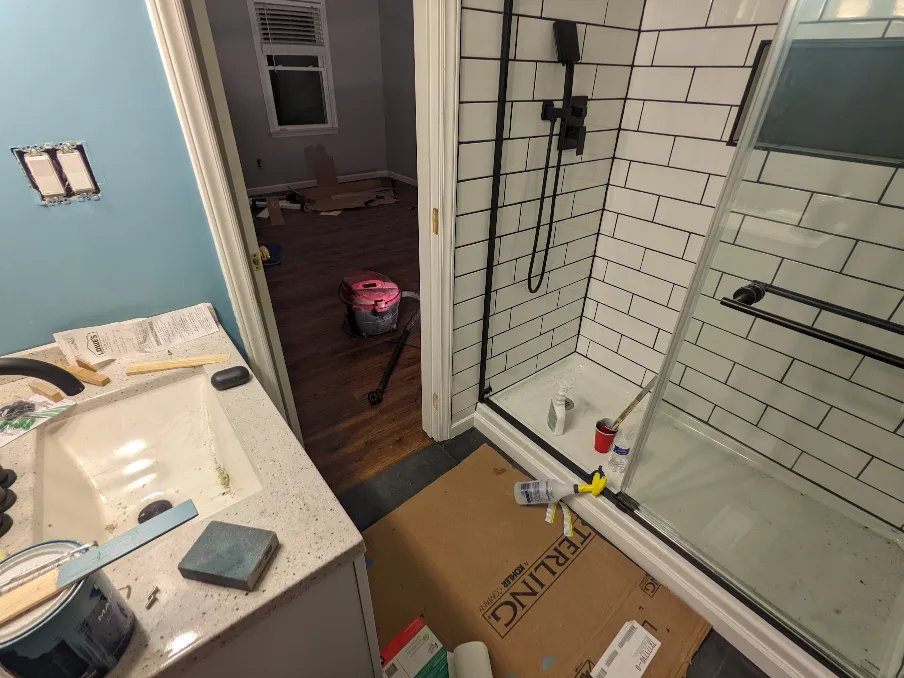
With the walls sealed and the shower pan installed, it was time to start tiling the shower. I used wide subway tiles, and added a leftover slate tile as an accent at the back of the niche. I actually cut all of the tiles for the niche before starting, since they would be the trickiest to install, along with the first layer of tiles around the shower pan. If the first layer is perfect, all of the layers above that are easy. I used a laser level to keep things perfect.
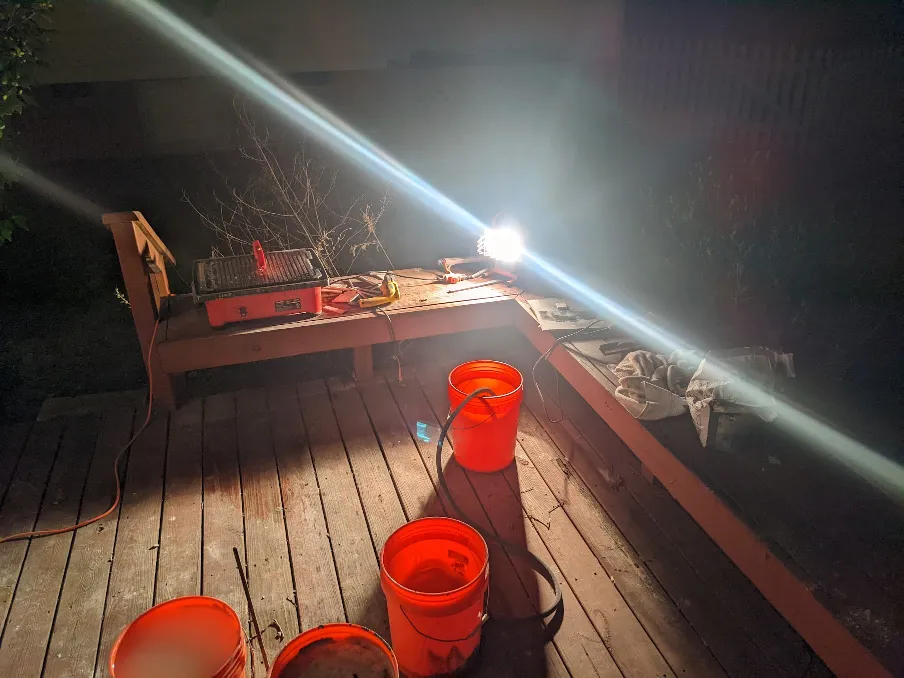
Unfortunately, these tiles needed to be cut with a water-lubricated tile saw, and at this point, it was December. So each tile had to be measured, walked down stairs and out to the back porch, where my near-freezing tile cutting operation was set up. All of this happened on a timer, because mortar will dry and becomes useless after around an hour.
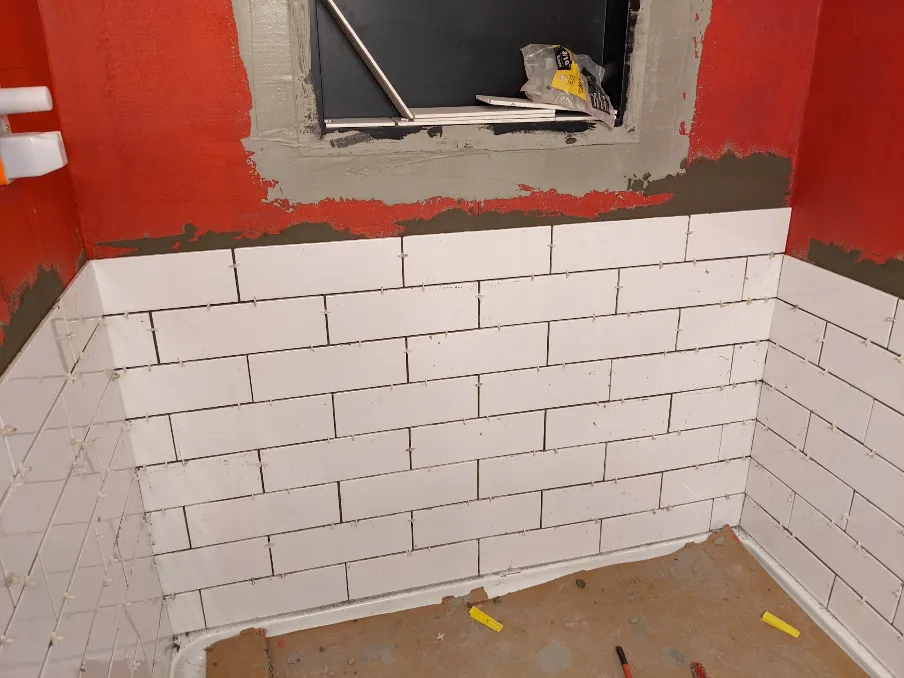
After the first layer, I was able to just repeat the process over and over until I reached the ceiling. This took a few days, with help from others to run tiles back and forth. With rubber spacers to keep things from shifting, and having the whole pattern planned ahead of time, everything was relatively simple and repeatable.
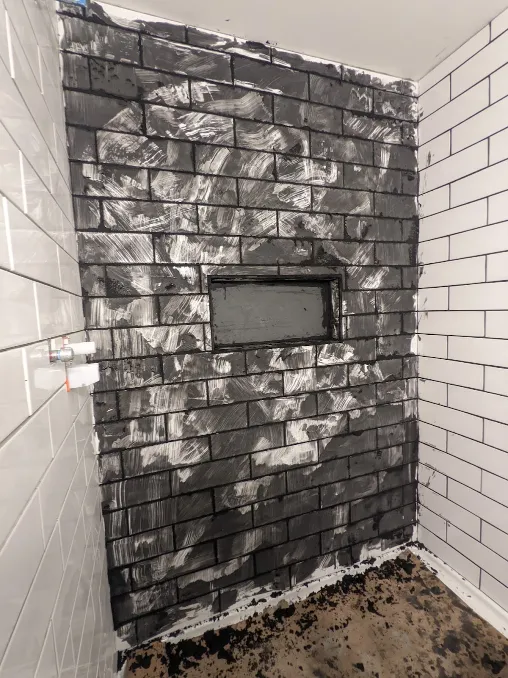
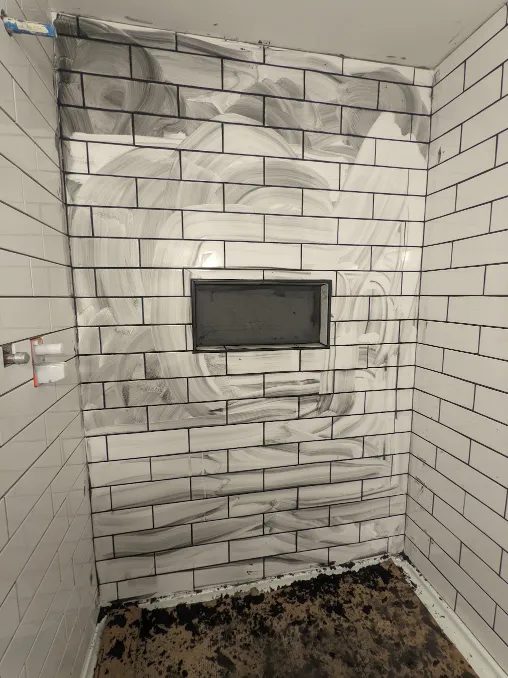
Now that the tiles were installed, it was time to grout. I used the same black grout that I had on my floors, but it was a terrifying process to apply it on white tile. I had about 30 minutes to clean it all up before it became semi-permanent, but I think it turned out really well. The edges of the shower were then sealed with a color-matched charcoal silicone.
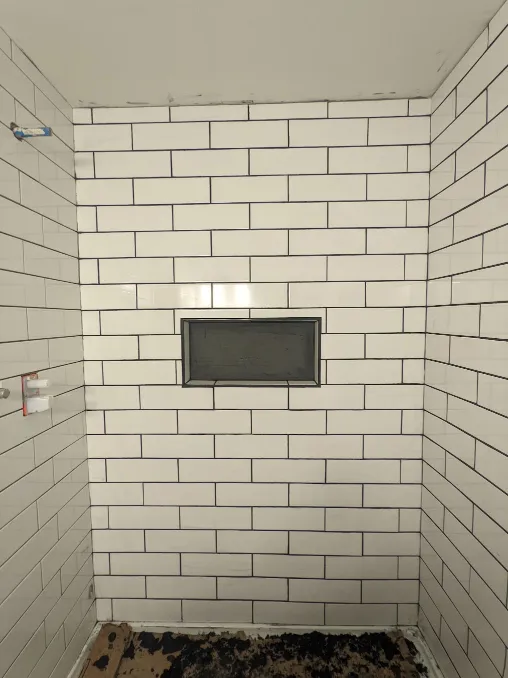
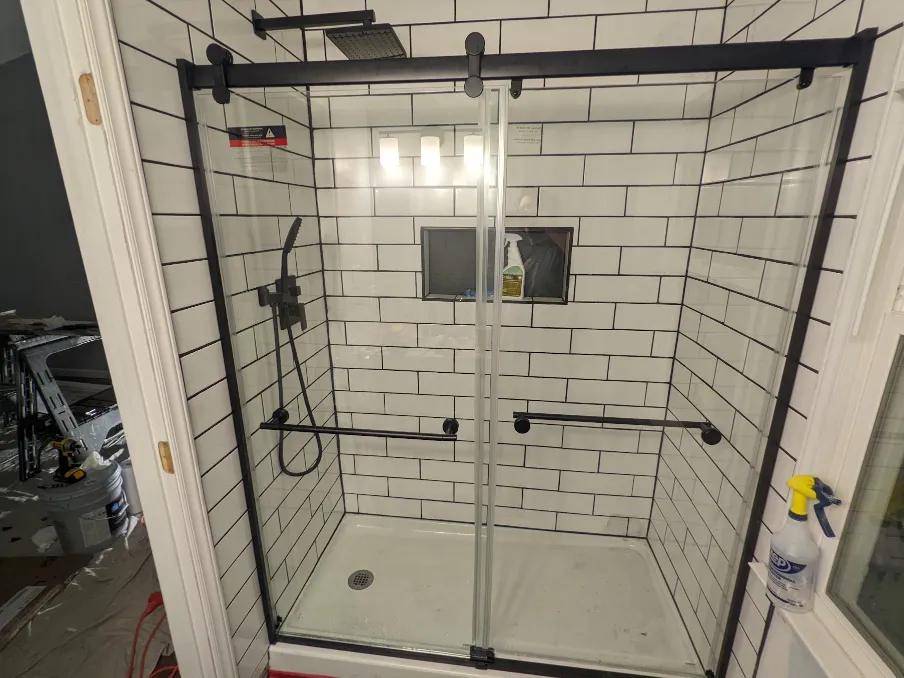
Finishing touches were the only step left for the shower. It still needed hardware, as well as a door, but it felt like the final stretch. These components had been delivered months before, and were pre-assembled kits. They were actually fun to install. The support blocking I had added months prior lined up perfectly to support the top bar of the shower door.
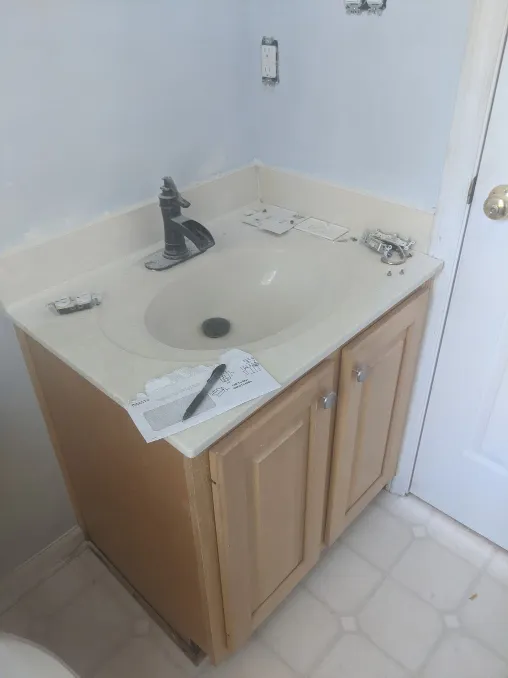
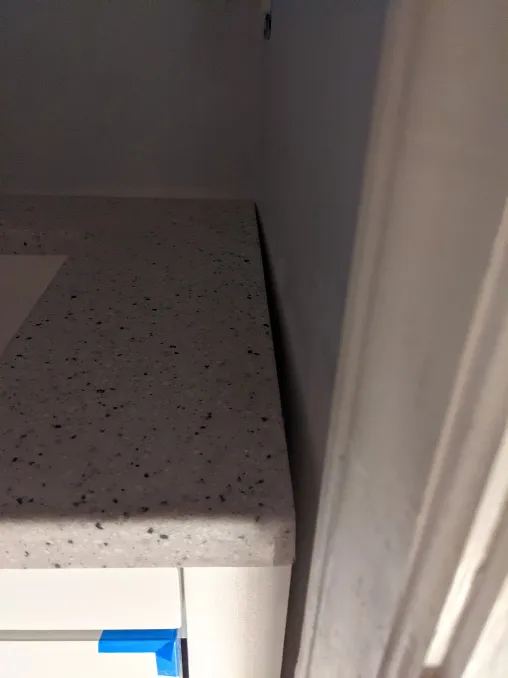
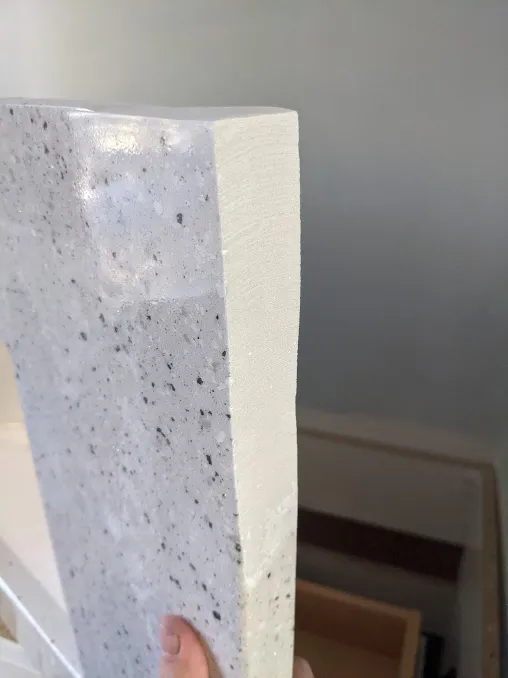
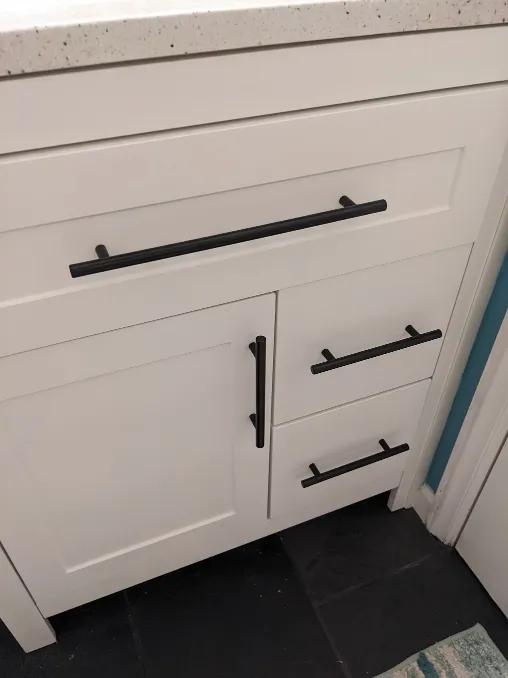
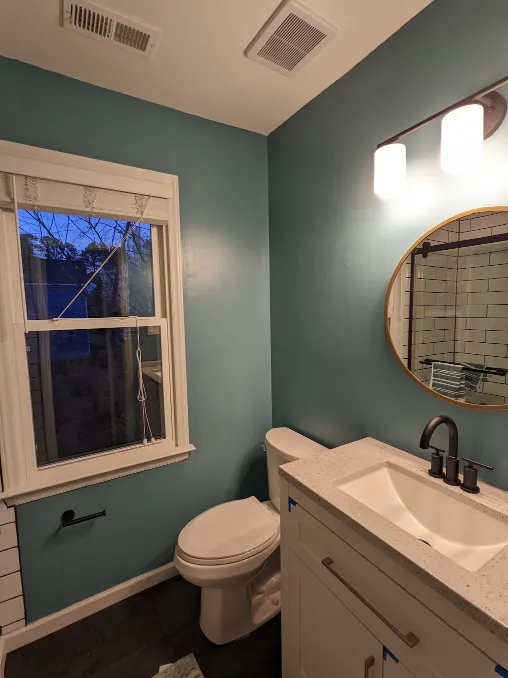
Now, I turned my attention to the vanity, which I selected to maximize the amount of drawer space available in such a small room. Unfortunately, this installation revealed another issue with the room: It wasn't square. Aligning the vanity with the back wall, a 1/2" gap would be visible at the front. To solve this, I took an angle grinder to my new purchase and carefully shaved off the back corner until the gap was more acceptable.

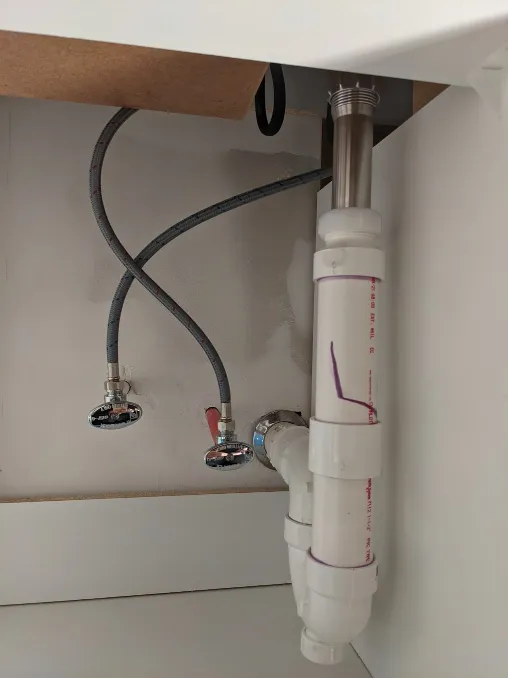
After that, it was just a standard installation. I hooked up a new faucet to my PEX lines, built a P trap with only 3 visits to the hardware store, and suddenly I had a vanity. I eventually picked up some replacement hardware for the drawer pulls that matched my faucet.

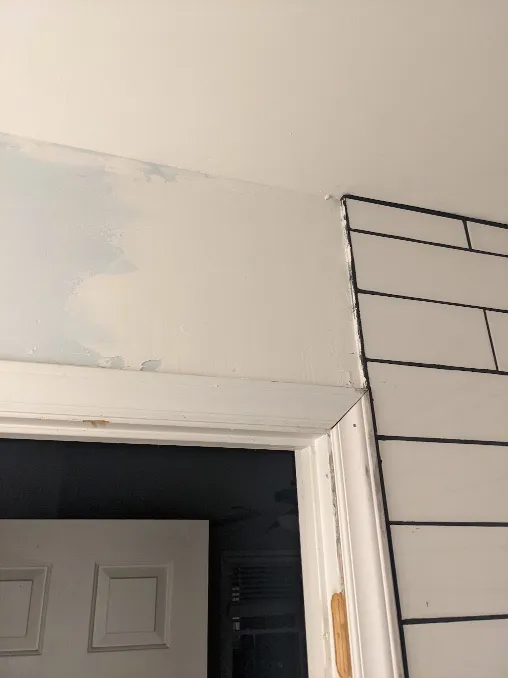
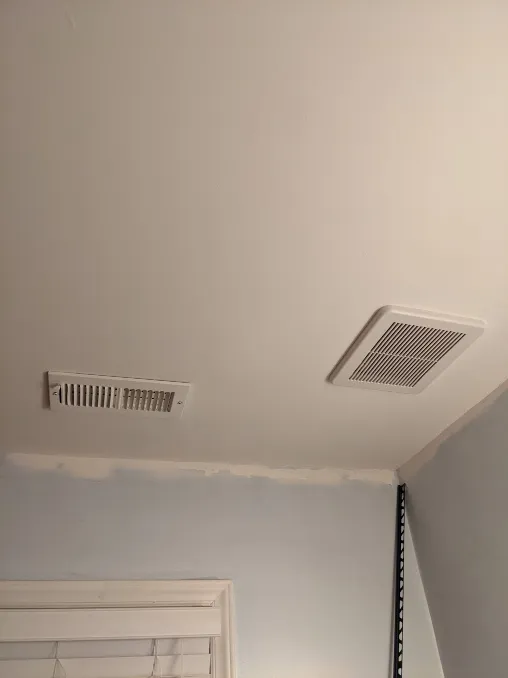
Before the toilet went in, I added all of the finish trim around the edge of the room, including a piece in front of my Shower Platform™ to hide the underlying structure. I also took this time to clean up the drywall and sand one last time. I wish I had spent more time sanding, the imperfections are very visible due to the sharp angle of my lights. I also finally installed the new extraction fan, a silent unit. The ceiling had been primed after I scraped the popcorn, but it also received a layer of paint here.
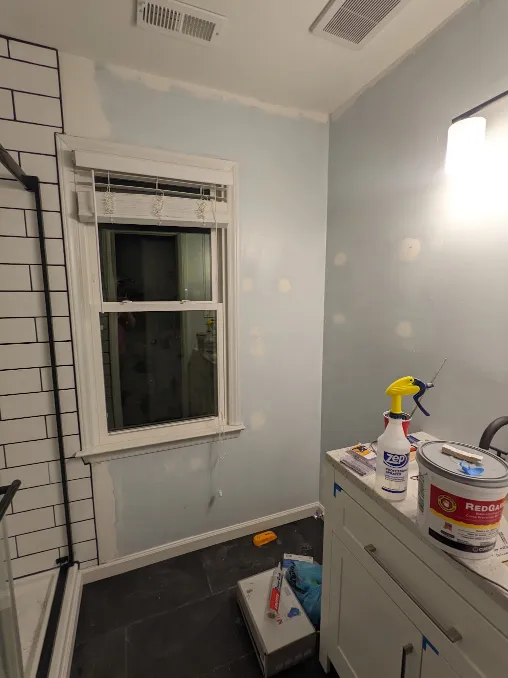
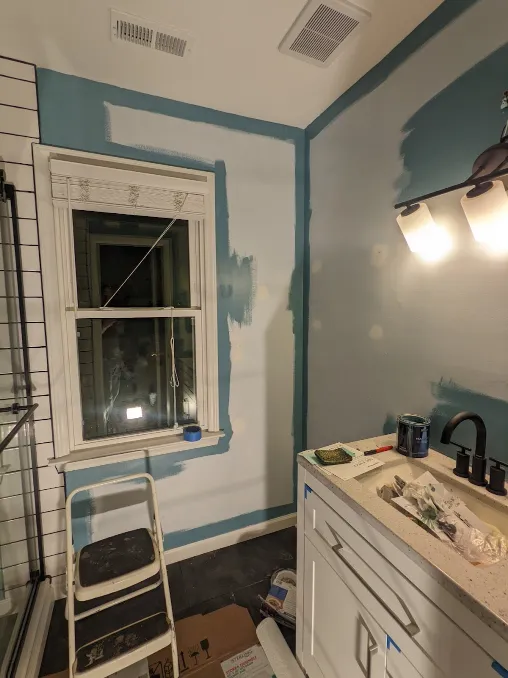
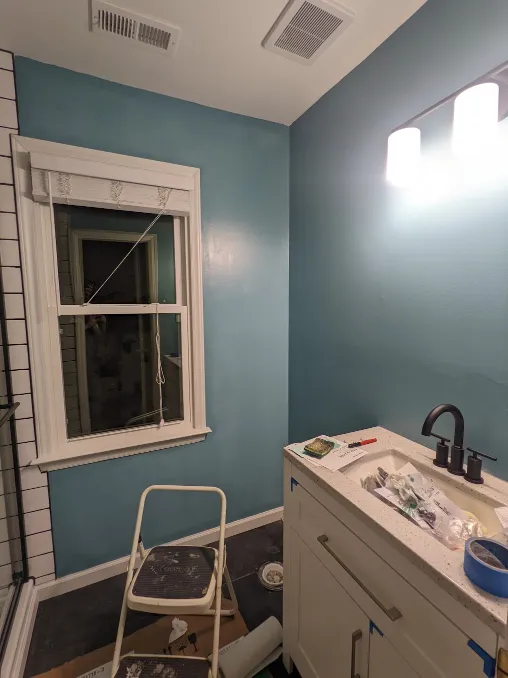
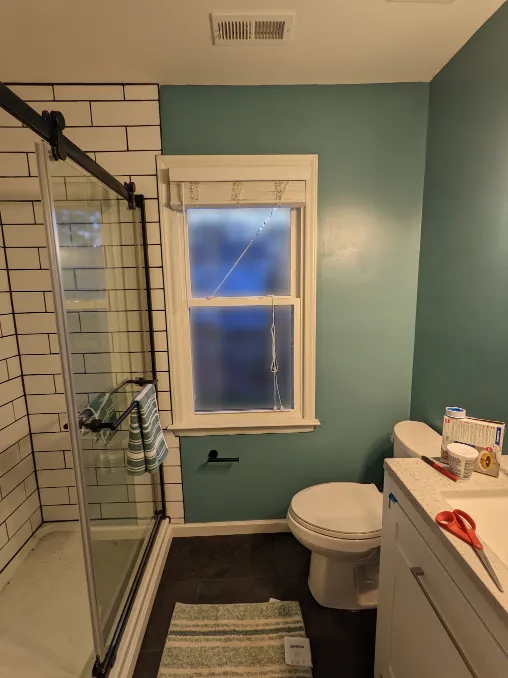
I tried dozens of paint colors, but I kept coming back to a deep, "clean," teal. It was a bold choice, but I really like the contrast it brings to an otherwise monochromatic room.
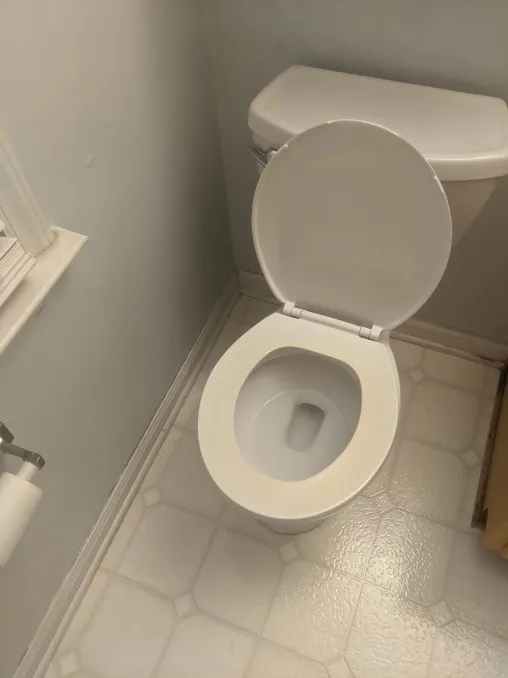
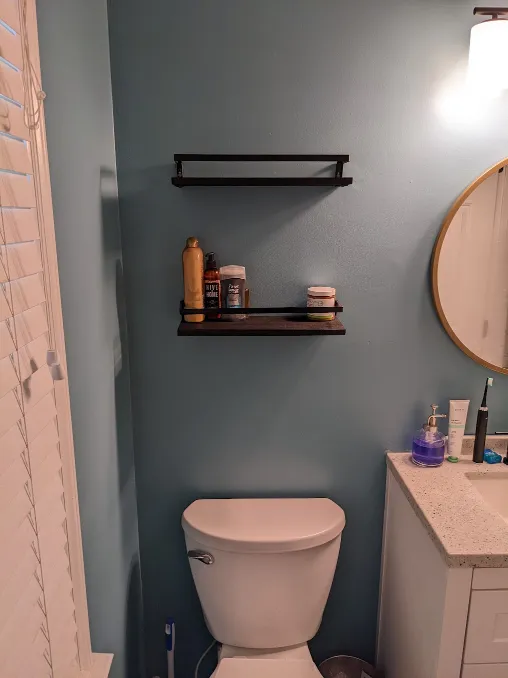
Within a week of painting, the whole house was ready to move into. I spent nearly an entire evening deep-cleaning, getting dust and powdered paint out of the room. The toilet install went quickly. I added a toilet roll holder, as well as a few hanging shelves for extra storage. I found towels and bathmats that matched the teal. The circular mirror was meant as a placeholder, but it grew on me and became a permanent fixture as well.

I'm very happy with these results, even with the significant time investment. The old bathroom was dated, inconvenient, and in some ways, totally unusable. Even the seemingly small changes, like getting a shallower vanity, made a huge difference. Doing the project myself, I was able to finish everything for around $3400, not counting tools, or PEX replacement. I also learned a lot of new skills. But most importantly, I learned to pay somebody else to do tile work.